|
TuffWing Outlaw Spec
FPV Race Wing |
|
 |
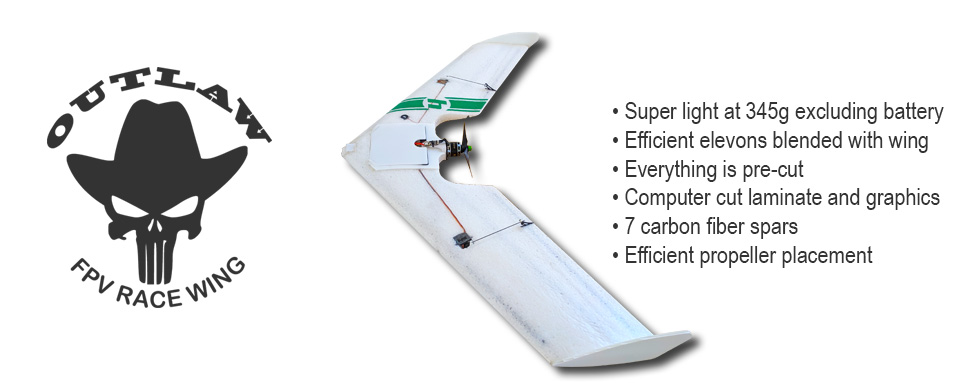
Overeview
$89

Specifications
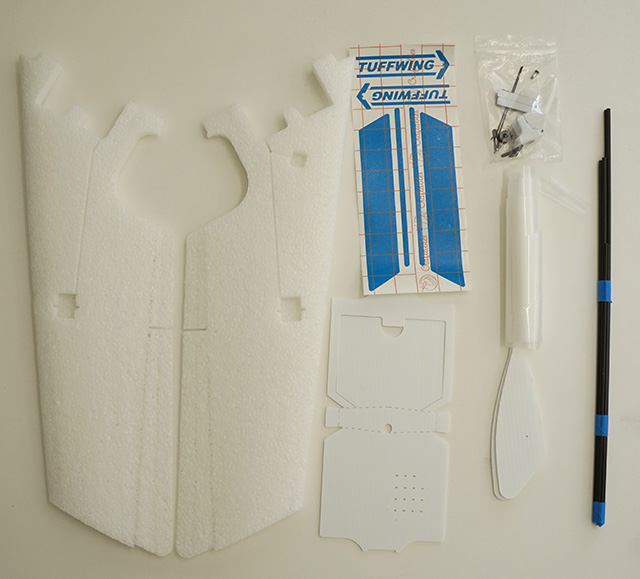
Kit contents
- EPP wing core with pre-cut servo pockets, elevon hinges, and
spar grooves
- Coroplast electronics bay and winglets
- (7) Carbon fiber spars:
- (1) Center 6mm x 17.25"
- (2) Leading edge 5mm x 19.5"
- (2) Aft edge 4mm x 17"
- (2) Elevon 3mm x 13"
- Computer cut laminate
- Vinyl graphics
- Light weight - low drag CNC cut control horns, Dubro micro
connectors, and .047 music wire pushrods
- TPU printed motor mount and camera mount (fits most 19mm
micro cameras - Foxeer micro predator, etc.)
- (4) m2x8 motor mount screws
- Laser cut velcro for securing electronics bay cover
- (2) zip ties for securing ESC and VTX
- 3D printed propeller spacer.
Additional building items needed
- Trim off the top front edge of the shucks and tape together. Hot glue on the tape helps hold.
Note: All gluing and laminating must be done while the wing is resting in the shuck.
- Use a small screwdriver to remove the cores from the spar grooves.
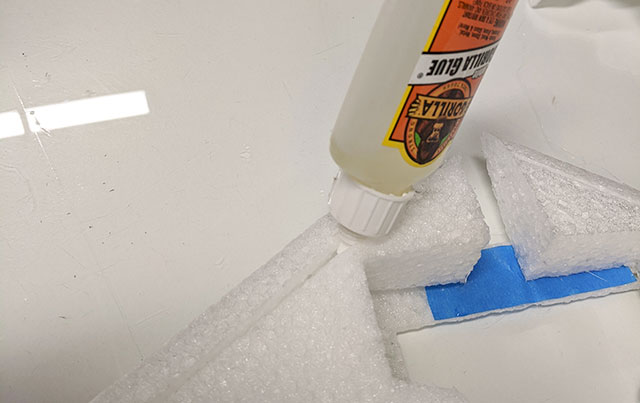
- Wet spar grooves and apply Gorilla glue -
Except elevon spars. You will use hot glue later.
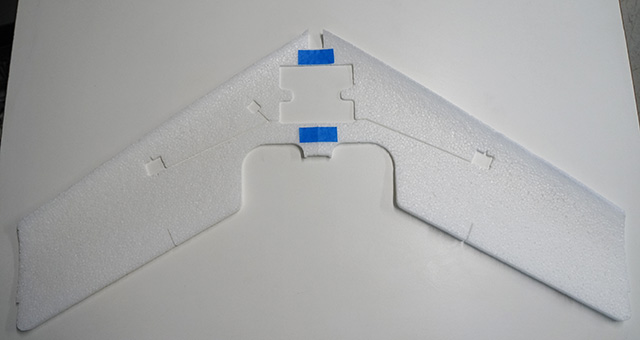
- Insert 5mm leading edge spars. Leave gap at wing tip.
- Insert 4mm aft wing spar.
- Join wing halves with 6mm center spar.
- Glue wing halves with hot glue at back of bay.
- Do not install 3mm elevon spars yet. They will be installed with hot glue next.
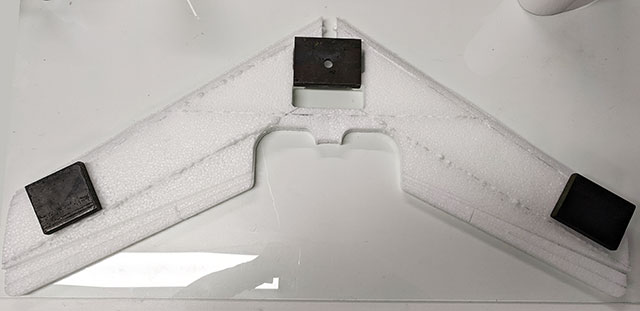
- Set wings on shucks, then add weights to hold wings perfectly flat.
- Spray water on Gorilla glue to activate and increase foaming.
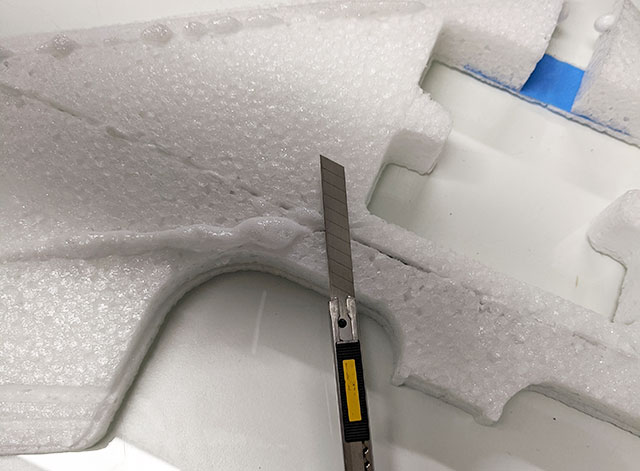
- Use an razor knife to trim expanded Gorilla
glue from spar grooves.
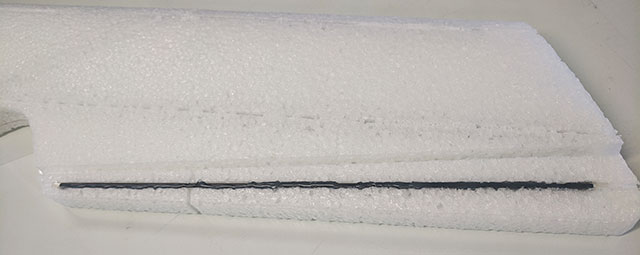
- Insert the elevon spars into the spar grooves, centered with even gaps on both ends.
- Apply a generous line of hot glue on top of the elevon spar. You will melt down the line of glue
and press in the spar with your film covering iron in a later step.
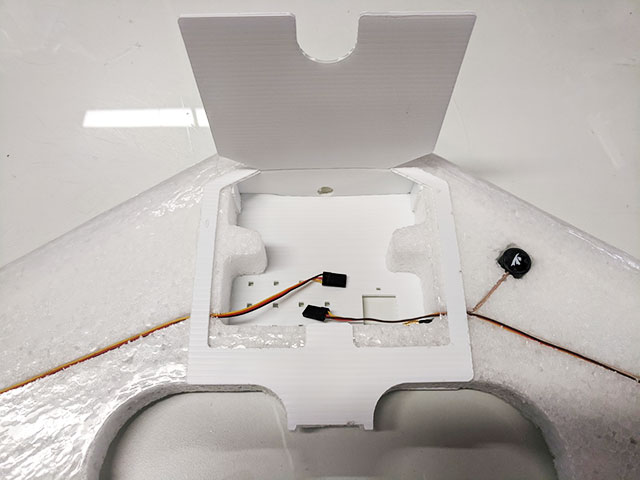
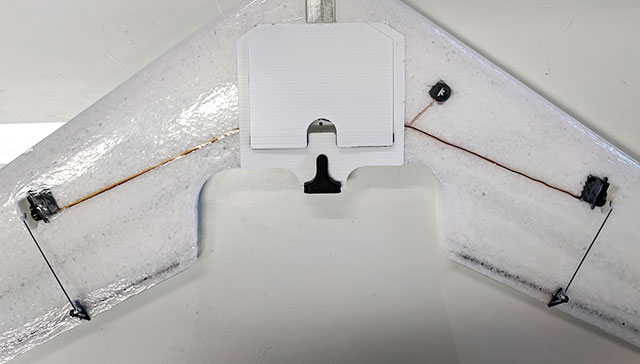
- Install the camera mount with hot glue. Camera mount top up
with servos up. Always apply hot glue to plastic parts, not the
foam. Hot glue will cool if applied to foam and the part won't bond well.
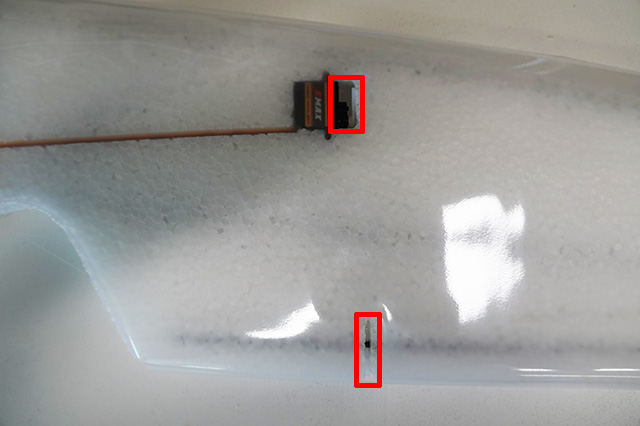
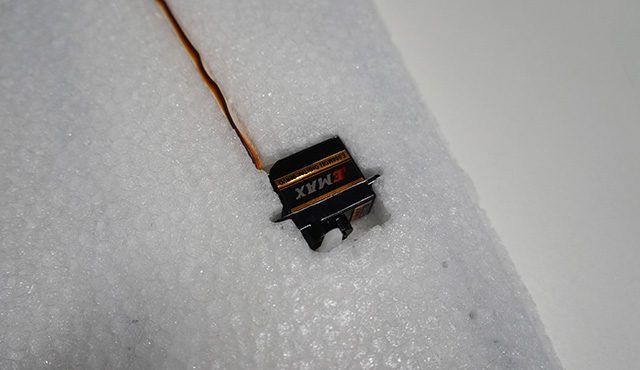
- Center the servo arm on the servo using your RC transmitter
and receiver or a
servo centering tool.
- Hot glue the servos in place as shown.
- Push the servo arm down flush with the top of the wing so it won't interfere with the laminate.
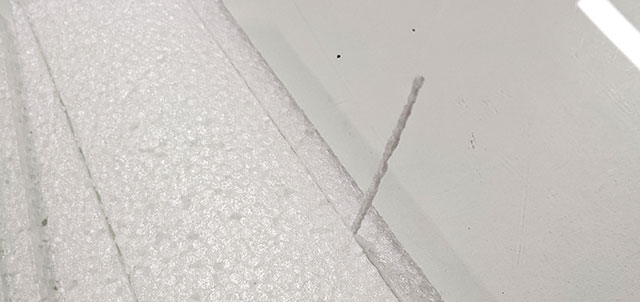
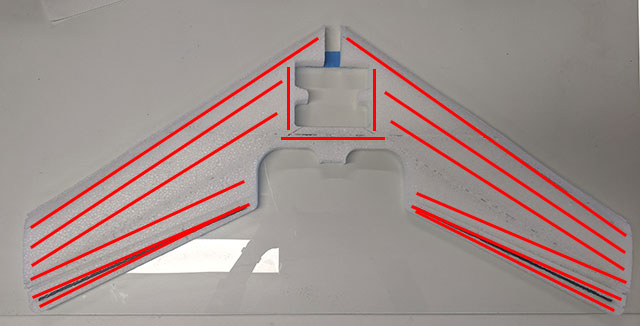
- Draw thin lines of hot glue as shown with your glue gun. This creates a strong bond between the
laminate and foam and stiffens the elevons when the hot glue
melts and soaks into the foam. Any glue lumps and be melted down
when you iron on the laminate.
- Do top and bottom.
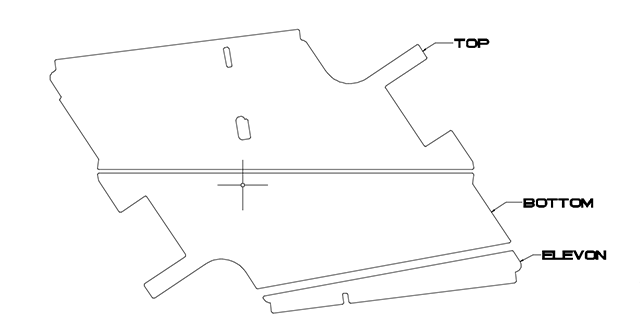
- Precut laminate drawing. Right and left included.
- Install the precut laminate elevon strips on the bottom.
-
Allow laminate to overhang back by 1/2".
Make sure wing is resting in the shucks on a level surface. Use
your film iron on top of the laminate to melt the hot glue and
make the elevon perfectly flat.
-
Lift up wing and iron overlapped laminate to top of elevon.
- Do both sides.
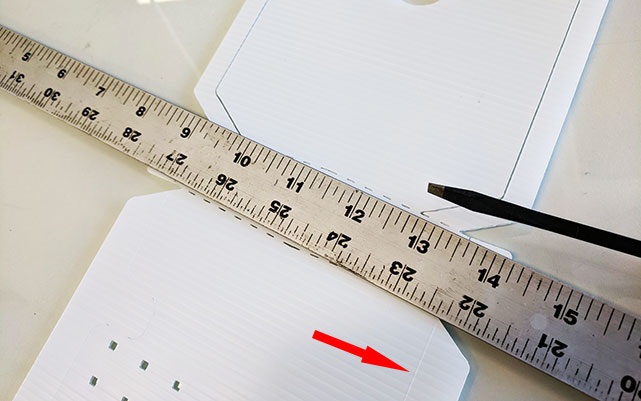
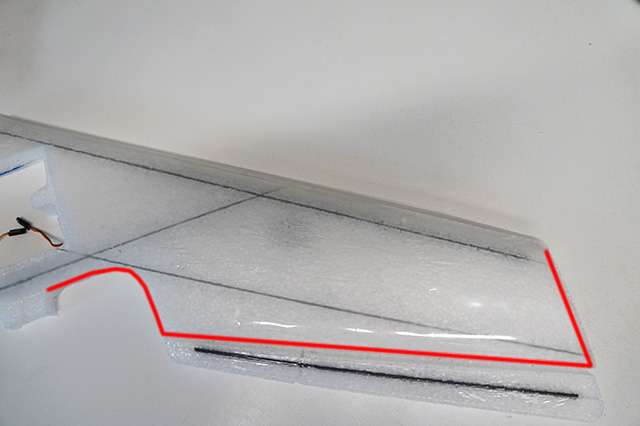
- Install wing bottom laminate. There should be a 1/8" gap at
the red line.
- Overlap leading edge 1/2".
- Keep wing in shuck while installing laminate with film iron.
- Do both
sides.
- Install wing top laminate. Align servo and control horn cut
outs.
- 1/2" overlap on leading and trailing edges.
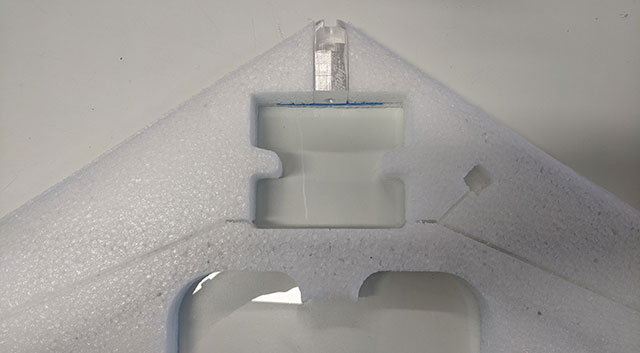
- VIdeo transmitter antenna should be installed.
- Use a dull tool and straight edge to crease the coroplast on the dotted line.
- Note the lightly cut score line on the coroplast. This is the bottom - up side. You will add hot glue outside of this line.
- Fold coroplast on dotted lines and insert into opening.
- Leave 1" gap.
- Apply hot glue front section, then quickly push forward and hold until cool.
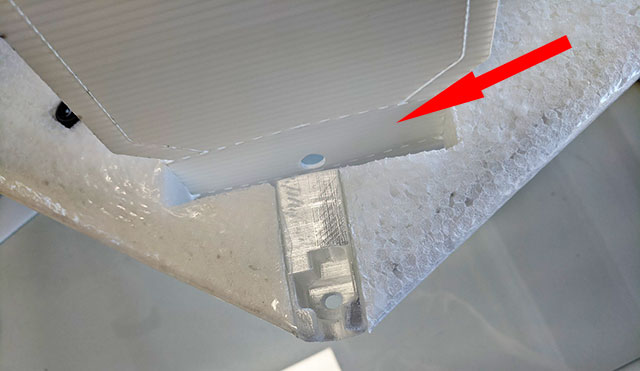
- Carefully line up coroplast bottom with trailing edge and hot glue.
- Glue coroplast top as shown.
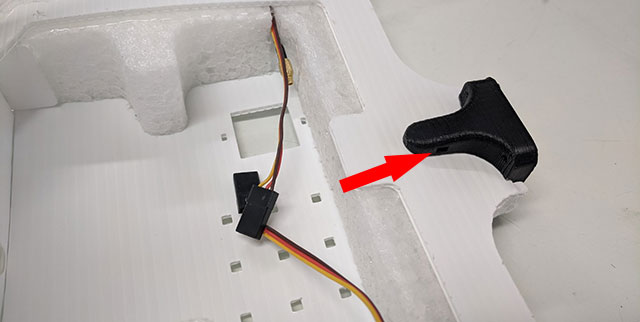
- Install motor mount as shown with hot glue. Note rectangle zip tie hole on top.
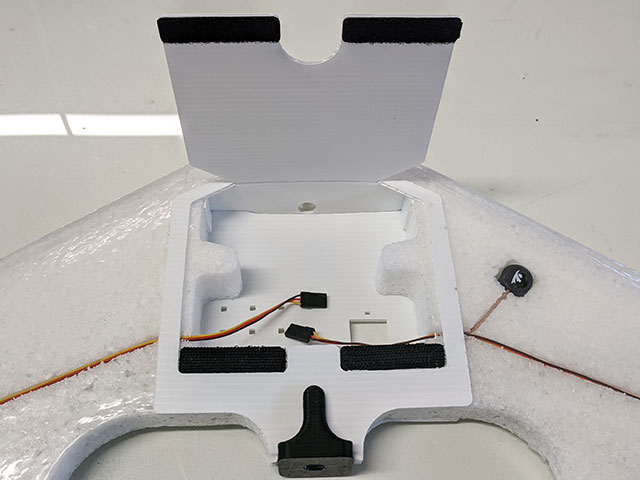
- Use hot glue to bond Velcro hook to wing top.
- Clean coroplast top cover and stick Velcro loop.
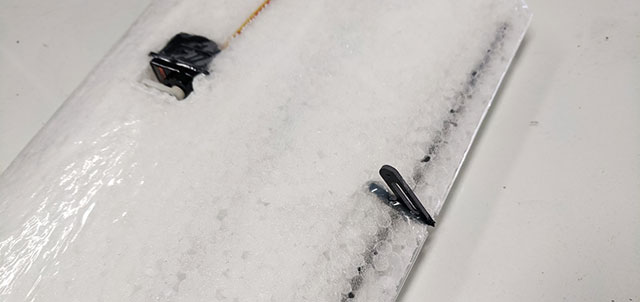
- Warm control horn with a heat gun.
- Apply hot glue to control horn cutout on wing.
- Insert control horn. Do both sides.
- Install pushrods and quick connects as shown.
- Use second
hole from end on servo control horn.
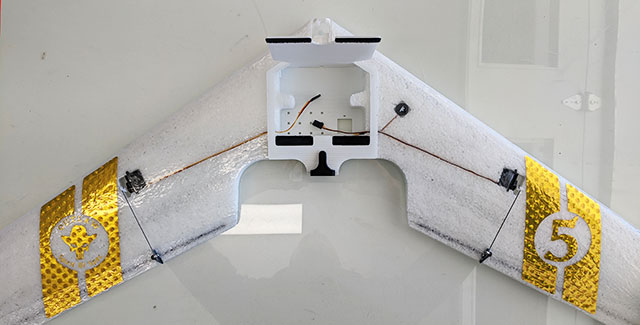
- Install graphics as shown.
- There are left and right winglets. Red lines are etched into coroplast. Warm winglet with heat gun and apply hot glue
to the etched area of the winglet - not the foam wing tip.
- Align hole in winglet with back of wing tip as shown.
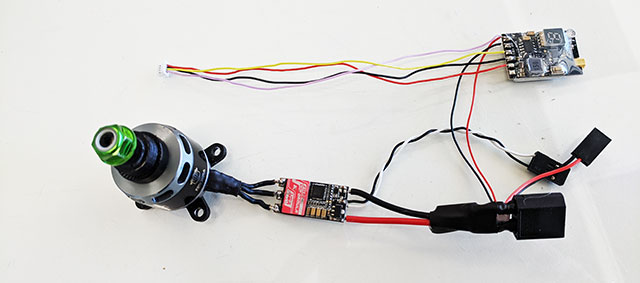
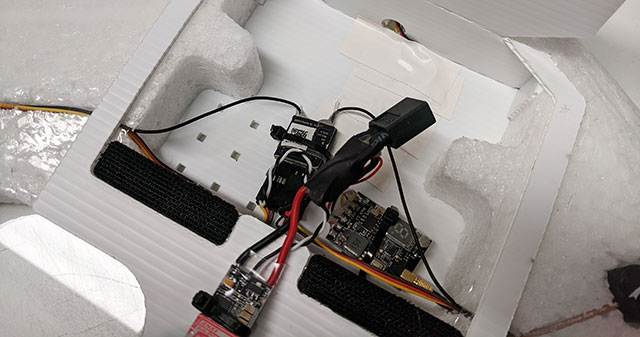
- Solder motor, ESC, BEC, VTX, and camera.
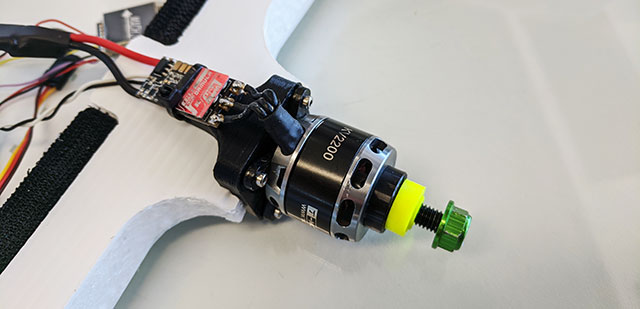
- Install motor with 2.5mm hex self tapping screws.
- Anchor ECS to top of motor mount with zip tie.
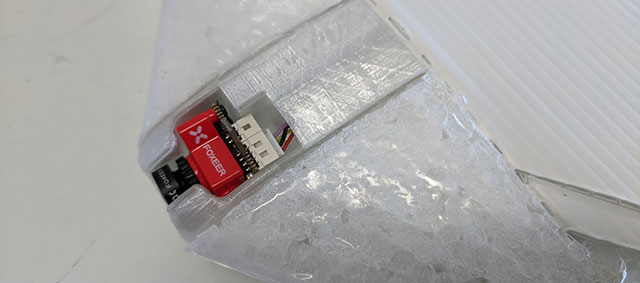
- Connect camera wires and insert camera into mount. Cover
camera with tape or add hot glue to prevent camera from ejecting
on impacts.
- Tape camera wires to bay floor.
- Anchor receiver and VTX to bay floor with zip ties.
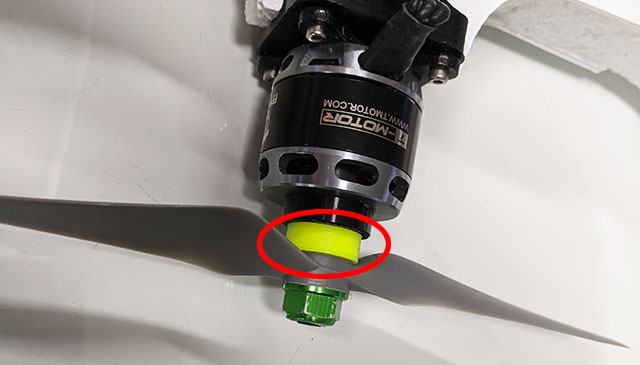
- Install prop and prop spacer.
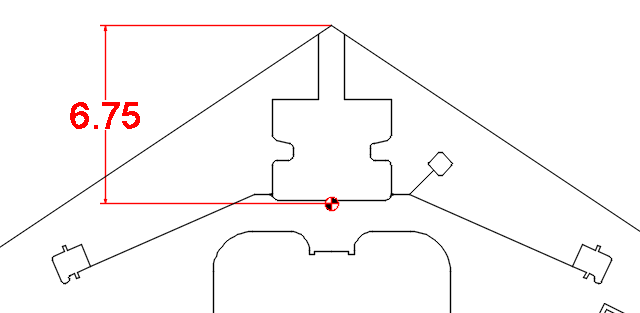
- Balance at 6.75 inches or less from nose. More nose heavy is
more stable.
|
 |
|
|