Overview
The following shows how to
rotate your Pixhawk on first generation UAV Mappers so it is less likely to contact the airframe and
move your compass 2 inches outboard to reduce magnetic interference from
your camera.
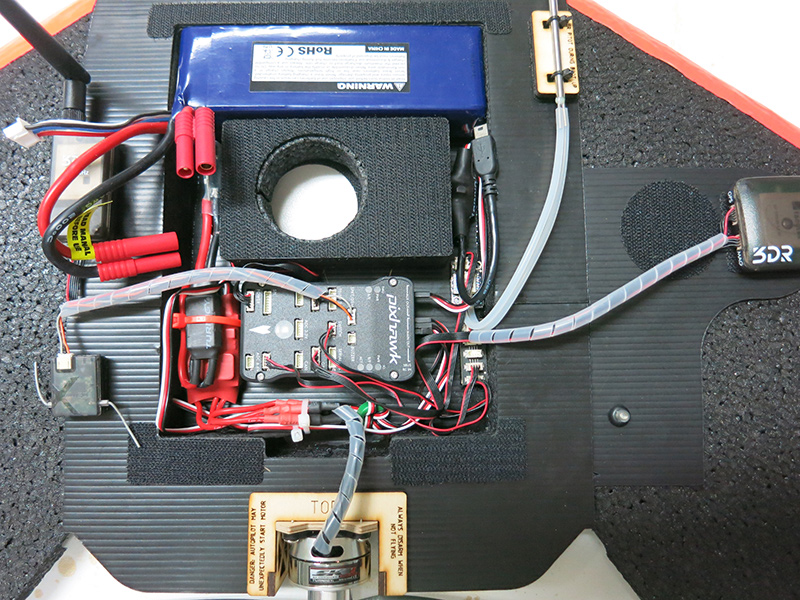
Rotate your Pixhawk so arrow points left
Requirements
- Updated Pixhawk Velcro
- 15 CM servo extension
- Remove the left servo wire from your Pixhawk.
- Add a 15CM extension and plug it back in.
- Remove the Pixhawk Velcro hooks from the base of the electronics bay
and replace with the updated Velcro as shown in the figure above.
- Move your airpseed sensor and I2C hub to the location shown in
the figure above.
- Change
AHRS_ORIENTATION to 6.
- Calibrate your Accelerometer and Compass.
- Verify the
Pixhawk is properly responding.
Reposition Compass
Requirements
- Wide CoroPlast compass plate
- 30cm DF13 6-6 cable
- Updated compass Velcro
- Use a small flat bade screwdriver to remove the Arm switch plug from
the top of your Pixhawk.
- Lift the Arm switch up from the Coroplast compass plate.
Carefully feed the Arm switch wire through the opening on the base
of the electronics bay.
- Peel the Coroplast compass plate off the wing.
- Use CA glue and activator to glue the new Coroplast compass
plate to the wing.
- Reinstall Arm switch.
- Install new compass Velcro hooks.
- Replace 20cm DF13 GPS cable with 30cm cable.
- Set compass in new location and recalibrate.
|


