|
Do the following to geotag your pictures with a
Pixhawk log file.
- Remove your microSD card from your Pixhawk.
- Place your microSD card into a microSD card reader and view the files in Windows.
- Navigate to USB: > APM > LOGS.
- Locate the .bin file that was recorded during your photo
mission. Copy it to the folder containing your pictures.
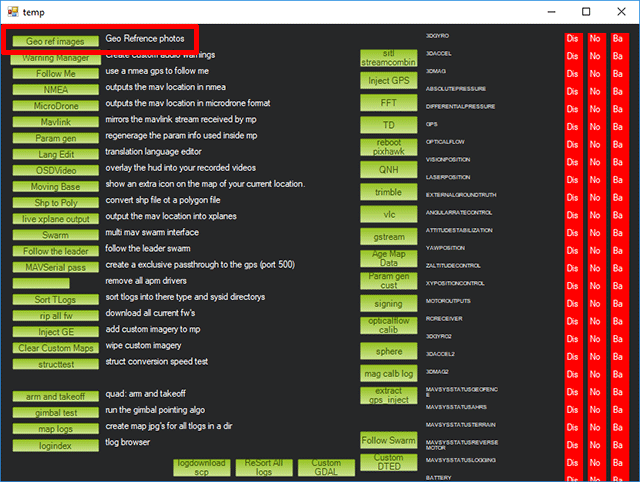
- Start Mission Planner > Control + F, then
select the Geo ref images button.
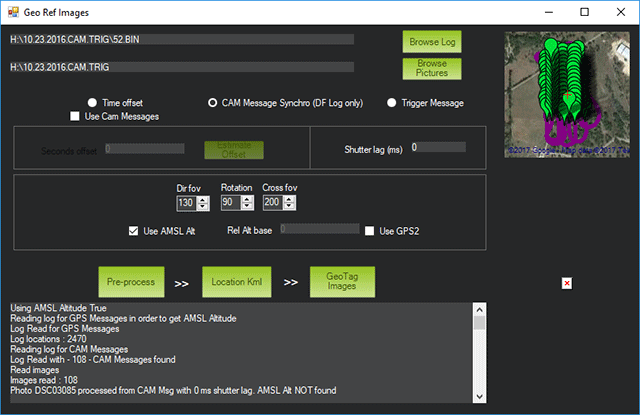
- Select Browse log and select your .bin file.
- Select Browse Pictures and open the folder
containing your pictures.
- Select CAM Message Synchro (DF Log only).
- Select Use AMSL Alt (GPS Altitude Above Mean Sea Level).
- Select Pre-Process.
Note: You must have the same number of CAM messages recorded in your
Pixhawk .bin file as you have photos. Mission Planner will abort the
geotagging process if there is a mismatch. Use a
hot
shoe geotag cable to avoid mismatches.
- Select GeoTag Images.
- A new set of geotagged photos will be created in ../Your
Pictures Folder/geotagged.
|